 2025-11-24
 Content
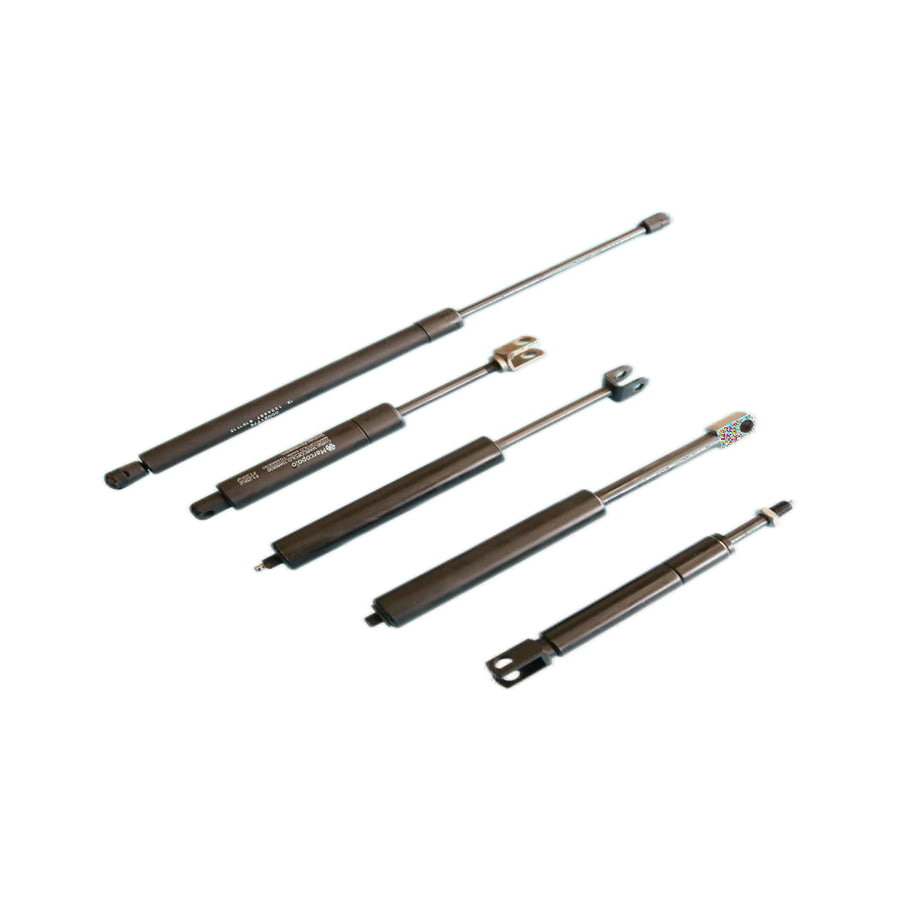
A gas spring (gas strut) contains pressurized nitrogen and a piston assembly to produce a controlled push/pull force. Most gas springs are factory-sealed and their internal pressure is not intended to be modified by end users. In practical terms, "adjusting" a gas spring usually means changing the effective force or leverage seen by the moving part — by altering mounting positions, using different end fittings, adding spacers or sleeves, or switching to an adjustable-fit gas spring product. This article focuses on safe, constructive, and commonly used methods to tune or adapt gas springs on doors, hatches, lids and industrial panels.
Gas springs are pressurized devices. Never puncture, cut, weld or heat a sealed gas spring to try to change its pressure — that can cause rapid decompression, flying fragments, severe injury or fire if oil ignites. If a gas spring leaks oil, is bent, or has lost force, replace it or have a certified technician handle disposal. Always wear safety glasses and gloves when working near compressed components.
Altering the gas spring's mounting positions on the moving and fixed parts is the most reliable way to change the effective force on the lid or door without modifying the gas spring internals. Moving the fixed end closer to the hinge increases mechanical advantage (reduces required spring force); moving it away reduces mechanical advantage (increases required spring force). The same principle applies to the moving end relative to the hinge.
Misalignment causes binding and false "weakness" perception. Adjustable ball-joint fittings, clevises or threaded adaptors allow precise positioning of the gas spring ends to ensure straight-line motion and full stroke. This is a fine-tuning step after rough balance with mounting changes.
Spacers or sleeves placed at the mounting boss can change the effective compressed length, slightly increasing or decreasing preload at the closed position. Stroke limiters or mechanical stops reduce travel so a spring with lower force can still hold the lid at desired angles. These are mechanical adjustments — not internal gas pressure changes — and are safe if done correctly.
Replace the gas spring if any of the following apply: visible oil leakage, bent piston rod, inconsistent damping (jerky motion), audible gas leaks, or if the spring no longer meets the required force range after mounting adjustments. Replacement is often faster and safer than attempting invasive modifications to a sealed unit.
Below are frequent symptoms, likely causes, and safe corrective actions.
| Symptom | Likely cause | Corrective action |
| Lid falls closed | Insufficient effective force or wrong mounting geometry | Move mounting toward hinge or fit higher-force spring; add spacers or mechanical stops. |
| Jerky motion | Internal damping failure or contamination | Replace spring; clean mounting surfaces; check alignment. |
| Noisy or rattling | Loose end fittings or worn brackets | Tighten fasteners, replace worn fittings, use locknuts or thread-locker. |
| Visible oil on rod | Seal failure | Replace spring; do not attempt to reseal or refill a sealed unit. |
Keep pivot points clean and lightly lubricated with a dry lubricant on the ball joints (avoid oil on piston rods). Check fasteners every few months for tightness. Protect gas springs from corrosive environments and direct heat. For vehicle or marine applications, choose corrosion-resistant finishes.
 +86-13861233850